
So you might have noticed that I’ve been on a bit of a photography bender lately.
Mostly sunsets,
with a few kids thrown in.
All of my recent photos have been taken with my iPhone, and not my big, fancy DSLR with a bigger, even fancier lens. In fact, I didn’t even get it out during our last two trips.
I have been doing all of my photography and editing with these apps:

Camera+: photography and editing
ProHDR: photography and editing
Instagram: editing and sharing (I’m @ObjectivityRach if you want to follow me)
Big Lens: editing (specifically adding Bokeh)
Pic Stitch: square collages for instagram
Pic Collage: full size collages
Photo Eraser: Noise cleanup
iMovie: video editing and stitching
Please note that the native iPhone camera is NOT included in my collection – I try to never use it. Which brings me to my first tip:
1. I shoot all of my “regular” photos in Camera+ because of the higher photo quality and the ability to control Focus and Exposure, something you cannot do in the native camera app.
This trick is not intuitive – I didn’t know it until Jamie showed me (photogeek friends are the best.) When you touch your main focal point,

Click on the plus in the top right corner. It then gives you separate controls for focus and exposure, which allows you to have much better lighting without compromising the focus.

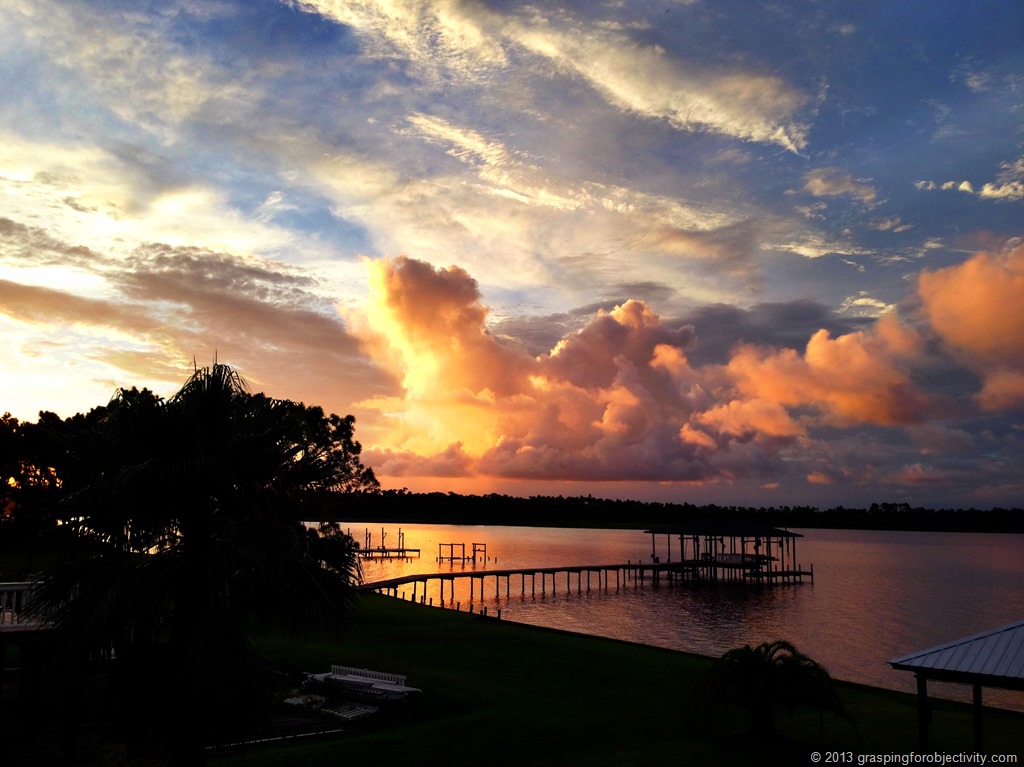
2. I use ProHDR when taking landscape stills – all of my sunset photos have been the product of ProHDR. HDR is an option that is in the native camera app, but the ProHDR app is much more intricate and gives you control over the brightness, contrast, saturation, warmth, and tint after shooting.

In case you wondered, HDR stands for “High Dynamic Range”, and is a beautiful facet of digital photography where your camera or phone takes two or more photos of the same scene at high and low light, then stitches them together to simultaneously prevent overexposure and underexposure. The benefit is a much more realistic, deeper image.
Here are two photos shot at the same time to show the difference:

3. The scenes and effects in Camera+ are fantastic when used in moderation –
unlike Instagram or ProHDR filters, which are all or nothing, you can control the amount of effect that you want in Camera+ (but not the scene, so you have to be a bit more selective with your choices there.)

There are also 36 effects available, offering a wide range of choices for your photo.

When it comes to the scenes, you’ll find that some work well in some settings but not in others. For instance, on landscapes, I often use the “Clarity” scene because it adds such crispness, but I never use it on people, because it just looks freaky.

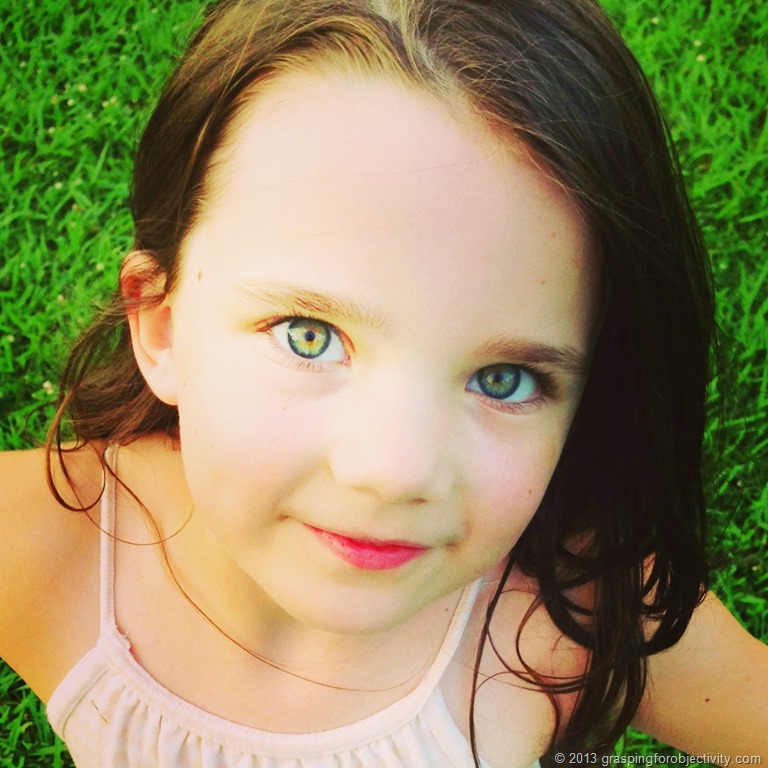
4. I have learned to watch for great lighting – This applies mainly to photos of my kids. When I look into their eyes, I can tell whether the lighting is going to be good or not based on how “cloudy” their eyes look. I have also learned to get Ali to turn in a circle as I follow her around to find the best lighting.
Noah is not nearly as cooperative (he’s actually quite anti-photo right now), so I just have to catch him when I can. Such as when he’s busy eating my jewelry.

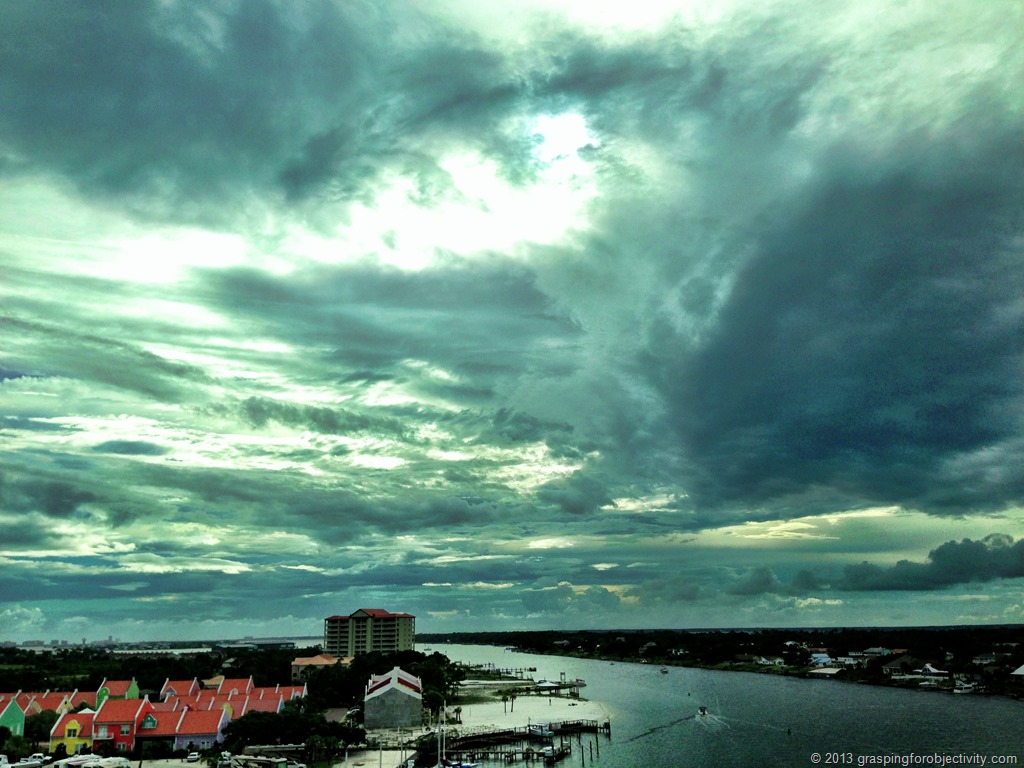
5. I stare at the sky a lot.
Sure, sometimes it’s obviously beautiful,
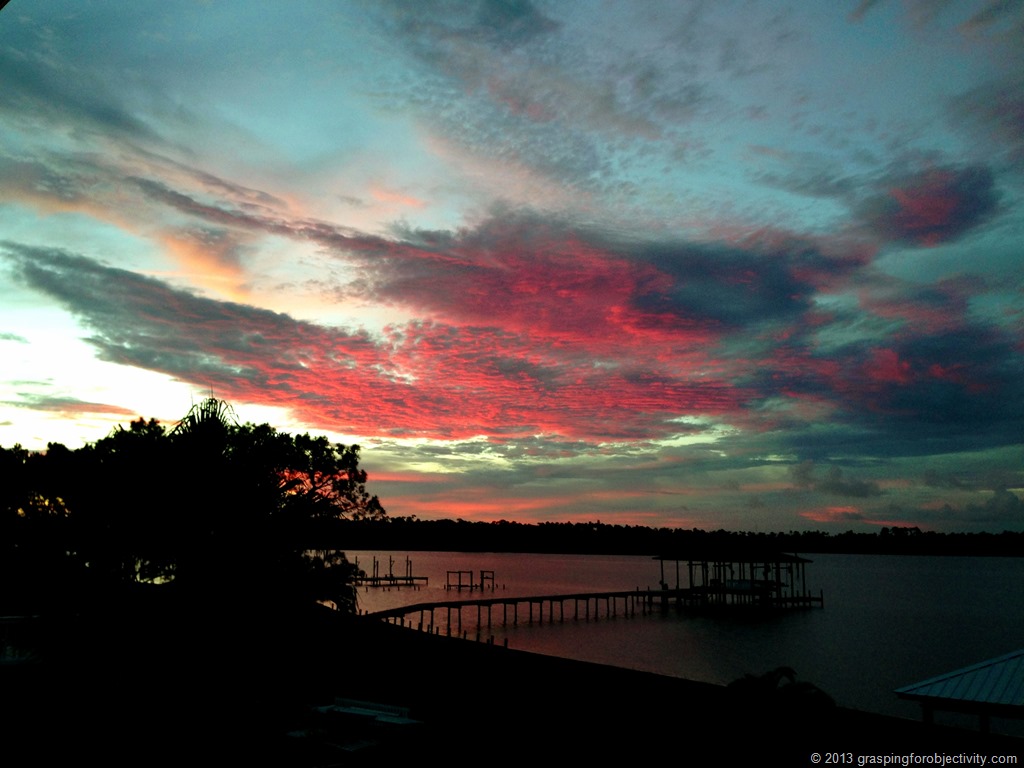
But other times I wouldn’t have noticed before my sky-obsession.
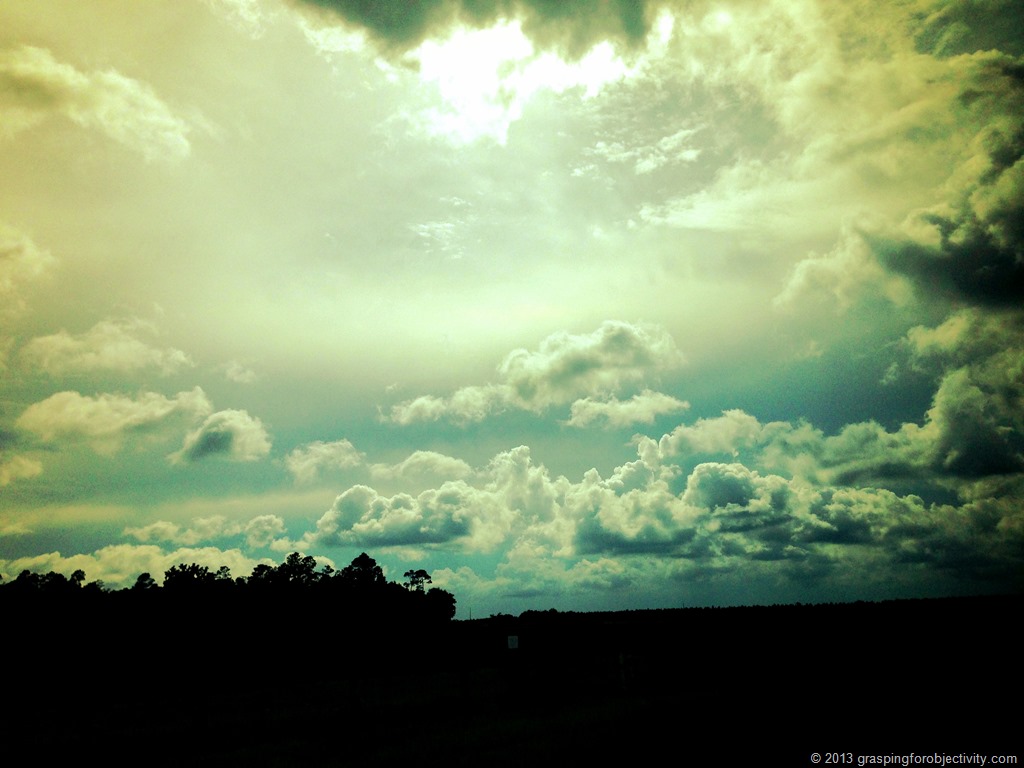
Also, sometimes the sky is more magnificent if it encompasses almost all of the shot.
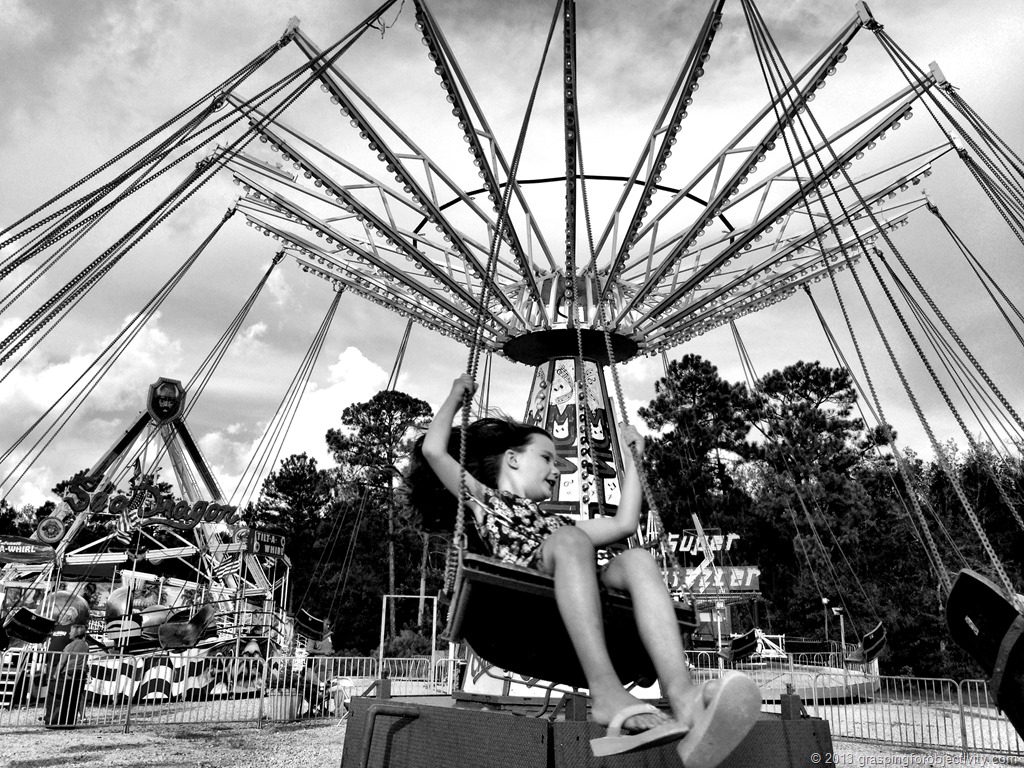
6. I take hundreds of pictures to get keepers.
I got photos of many empty seats and blurry Alis to get these three shots.


But since they were all taken in Camera+, I could delete the ones I didn’t need before saving them onto my main camera roll, preventing further junking up of my iPhone.
7. I try to find a spot where my foreground and background are equally interesting. Both of them having equal lighting is usually due to the help of the aforementioned ProHDR.


Although Ali is perfectly happy to strike a still-enough-for-HDR-pose,
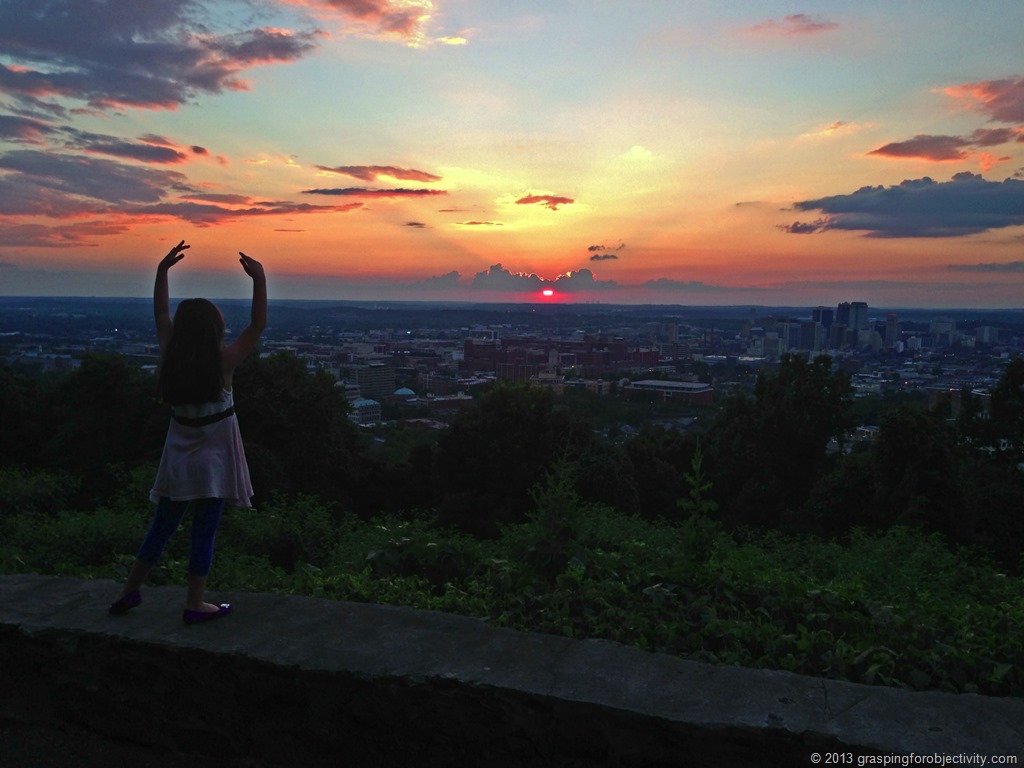
Noah usually just gets a regularly-shot photo, and on a good day, it comes out well.
For toddlers, being quick is your most powerful photography tool.

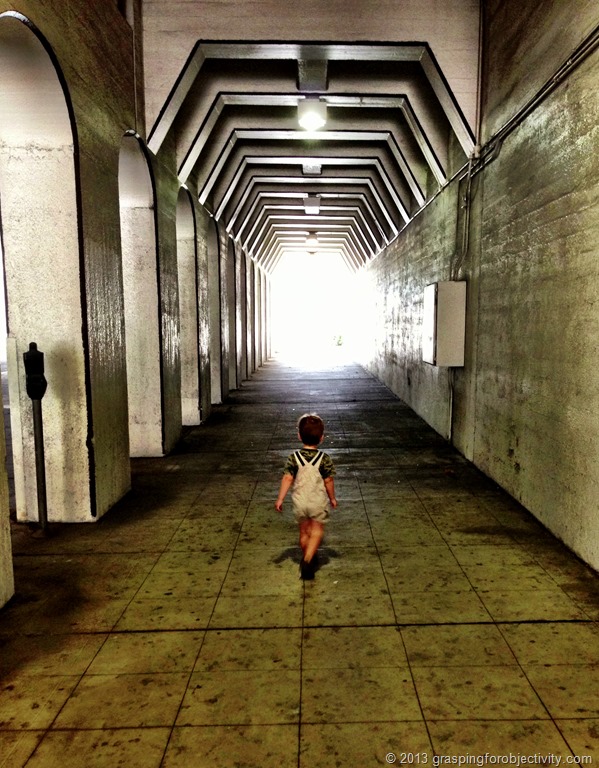
8. I try to shoot above the noise.
This photo was taken in a very crowded parking lot, but I angled the shot upward so you can’t see any of the cars – except for an annoyingly high Jeep-top.

I can often be seen holding my phone with two hands above my head, John-Cusack’s-boombox-style.
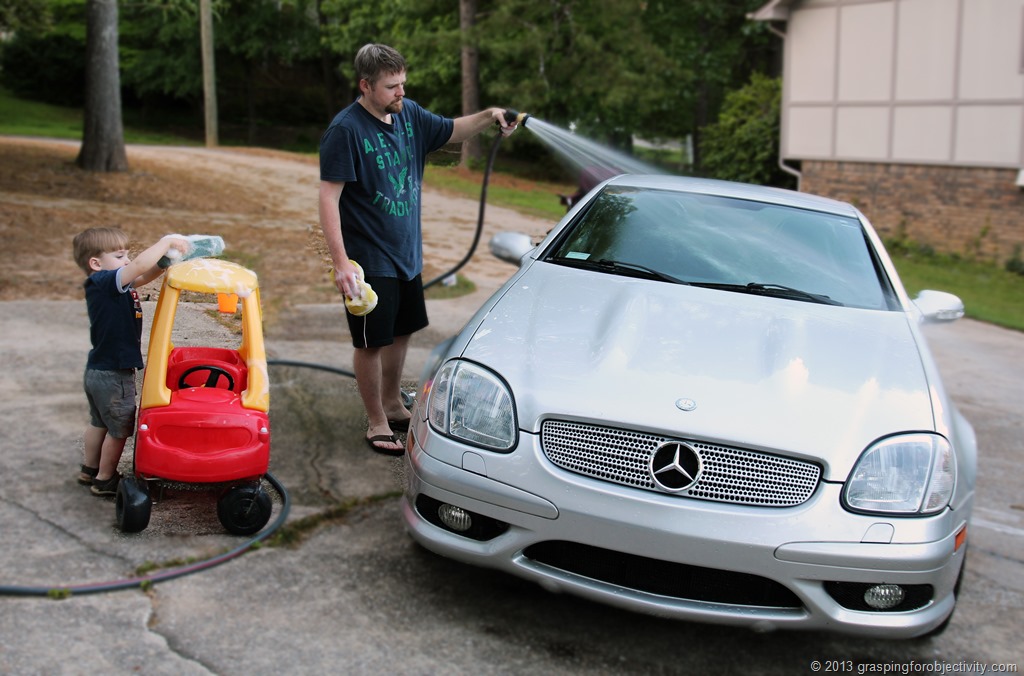
9. The Big Lens app adds a very controllable Bokeh (blurred) Effect. I have even been known to import my DSLR photos into my phone because Big Lens gives me more control than Photoshop.
I used it on this DSLR photo to lightly blur everything but Chris, Noah, and their respective cars:
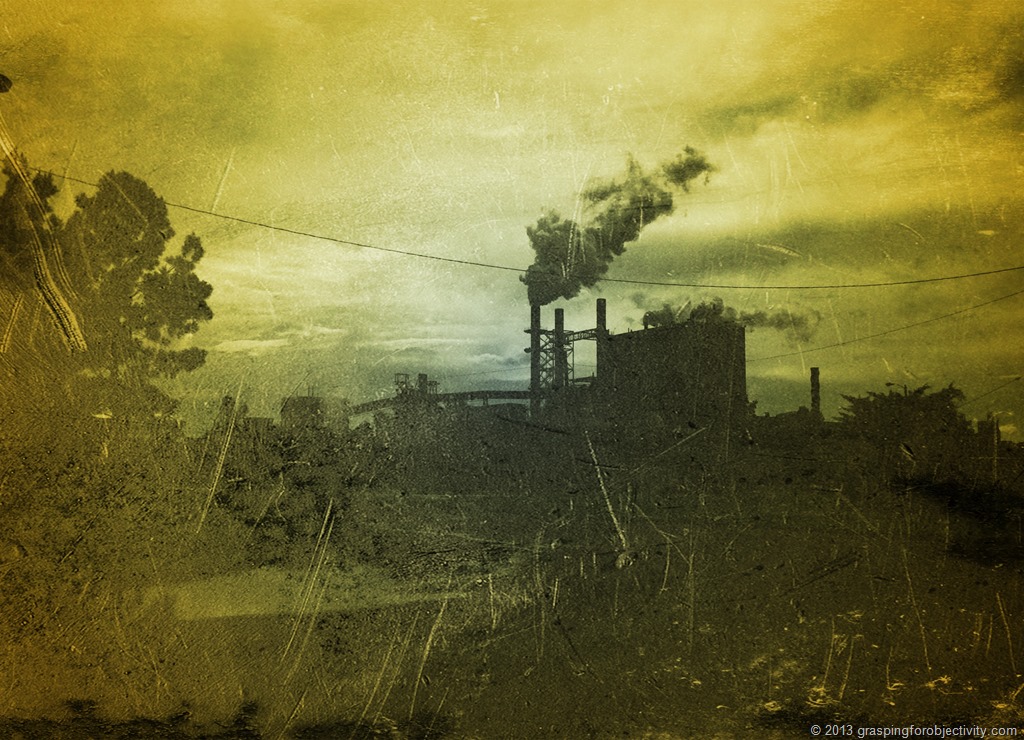
10. I try not to overdo filters, scenes, and effects, but every now and then, a little drama goes a long way.
We passed a spooky factory on a dreary day, and it begged to be turned into an antique.
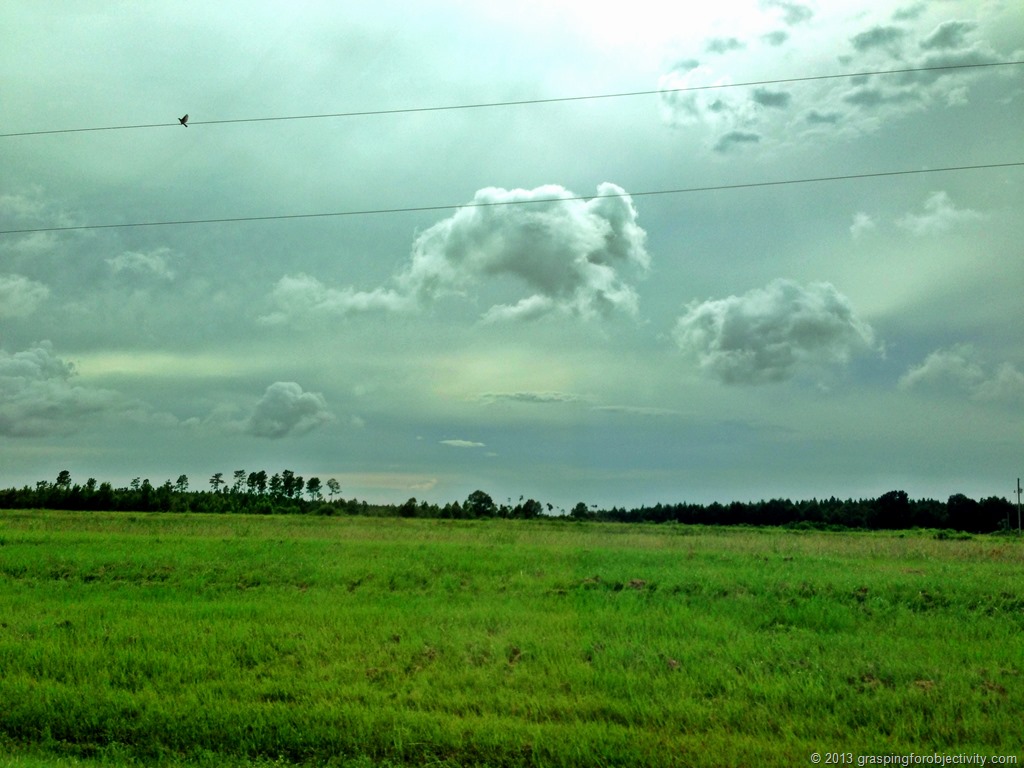
And this photo, of a bird on a wire, looked so much like a painting already that I didn’t feel guilty making it a little more so.
When photographing water, using highly contrasting filters and effects nicely catches the movement of the moment.

11. I’ve embraced less-than-ideal clarity.
The weather doesn’t always cooperate with photography. But sometimes that rebellion can be turned into a haunting photo – especially when using ProHDR.


12. Sometimes, a little magic is called for.
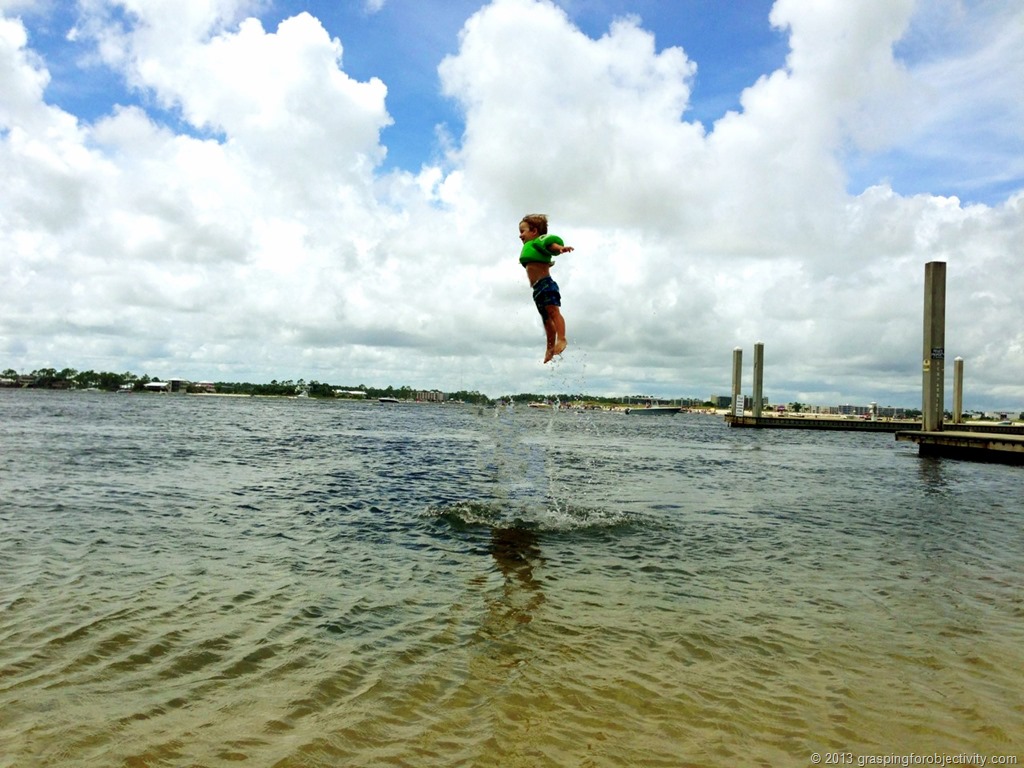
Noah LOVES this photo. He asks me to see the photo “where I fly”, and will occasionally look in the sky and ask “can I fly up there, Mommy?”
Here’s the raw photo:
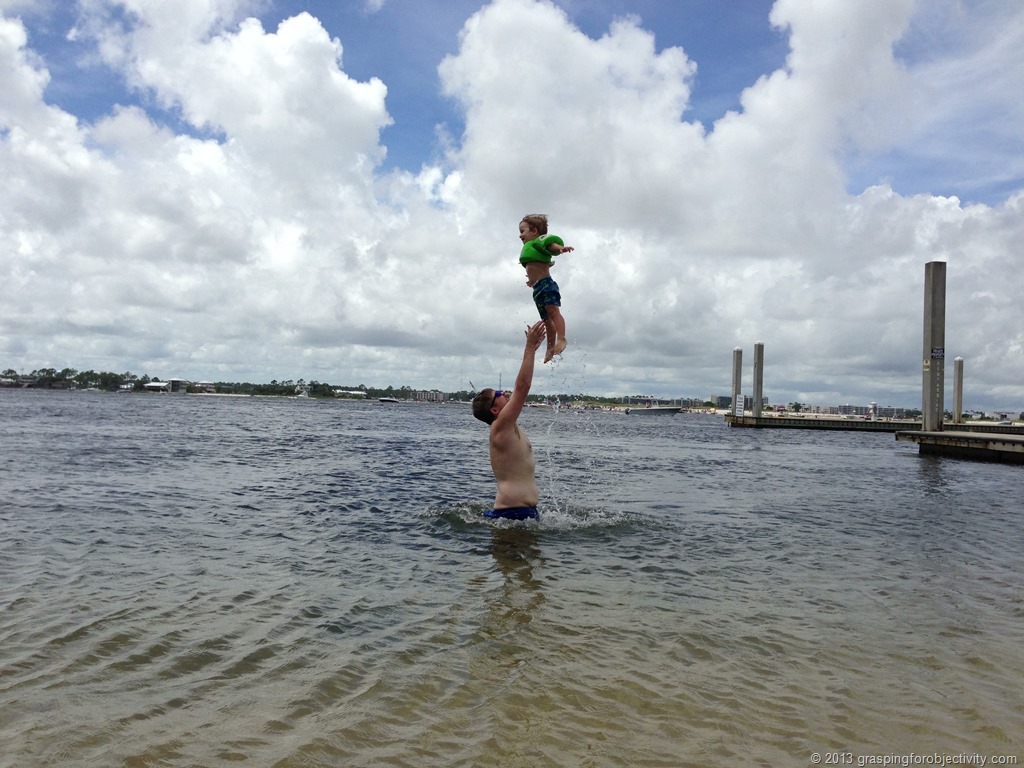
I saw his posture and “jetpack” and imagined what it could be, so while still on the beach, I found the Photo Eraser app. And I made this photo a thousand times better by erasing my husband – something I shouldn’t be allowed to say too often.

It really was that simple – lasso Chris and hit “Start Processing.” I did two touch-ups, but the whole process took less than five minutes, and Noah was soaring, an experience he didn’t have but will never forget.
What are your favorite tips and apps? Also, please let me know if you have any questions!
Thanks for all the fantastic tips! I don’t have an iPhone – I have an Android, but I found the Pic Stitch and Camera+ apps, and I found a Canon Lenses app that looks similar to the Big Lenses app so I’ll try that one out. And I found an app called PicsPlay that I will try in place of Photo Eraser.
Oh great! Thanks for the Android info. I should’ve borrowed a friend’s for research but I was to lazy.
Excellent tips! Thanks, Rach!
Holy WOW! I just took a picture out my office window with the Pro HDR app and was blown away with the image! Can’t wait to use it at the beach (vacation) next week. Great timing!
And Camera+ has never let me down.
Try PicTapGo yet? It is like instagram for editing only turned up to 11.
I’m so excited for you! It’s amazing what a difference the right camera app can make. You’ll have to share some vacation pictures with me!
And no – I haven’t tried that one. I’ll check it out. Thanks for the recommendation!
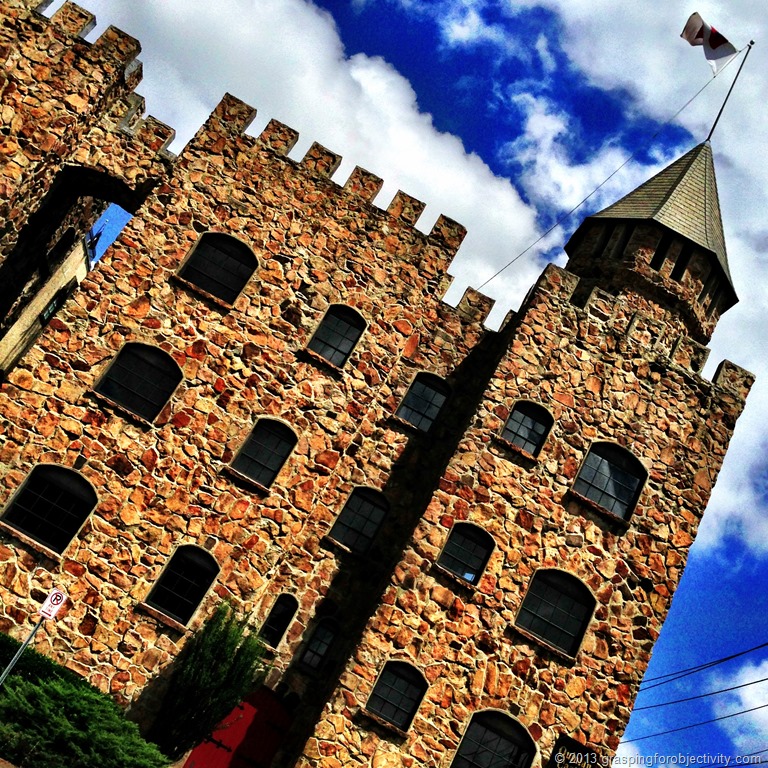
Love that shot of Liv on 5th! That’s one of my favorite buildings in B’ham. I’m dying to do some family portraits against that green brick.
Question: Was “clarity” used on that shot of Quinlan Castle? It’s absolutely beautiful!
Can’t wait to try these apps. Thanks for the suggestions!
Ooh – that building would make some fantastic photos.
I think I used “Cloudy” on the Quinlan Castle photo, but I’m unsure. It was either “Cloudy” or “Clarity.”
WOW! I loved my iPhone camera before…And I’ve just been using the camera app, Instagram and Picstitch. I downloaded every other app you listed. Now I just need to get the kids to do something cute (or absolutely infuriating – and hysterical) so I can document it.
I’m sure it won’t take them too long. I expect to see your photos soon!
This is great! Thanks for putting this together. I’m so glad you didn’t make we wait a long time after Y’all Connect! ;)
No problem! I needed to do it while it was still fresh on my brain.
Rachel, I cannot tell you how very much I enjoyed this article. I plan to get every one of these apps. I love taking photographs with my phone and these are great tips!
Thank you! I look forward to seeing your photos!
Thank you for so many helpful tips! I’d been wondering how you got so many great shots lately. I can’t wait to try ProHDR and Camera+!
I don’t even have an iPhone – or any cell, actually – but I’m pinning this for anyone who follows me that does! :) Good tips, Rach!
Thanks so much! And it’s not a bad way to live. There are some aspects of “iPhone life” that I fight every day, so don’t change – yet!
Great stuff! You should get some as canvases and hang them up. I did that with a couple of mine using Instacanv.as (http://www.instacanv.as).
I use Camera+ some but use the built-in camera more often for the quick HDR shots, and it’s so convenient to swipe up for the camera from the lock screen, especially for those spur-of-the-moment shots.
As for photography apps, I’ve had to shrink the number I have. My “go to” app for most editing is Photoshop Touch (not to be confused with Photoshop Express, also in the art store). It will replace most but the highly specialized apps and the filter apps. With layers and multiple selection tools, it’s extremely powerful, but I think it’s easier to use than the desktop version. Nothing in the App Store seems to come close.
For filters, I like DistressedFX, though I sometimes have to play with it a lot to get the look I want. I also like Glaze for turning photos into paintings and ToonPAINT for the cartoon/sketch look.
I use ProHDR too, but sometimes I’ll use Simply HDR to get that artsy HDR effect after the fact. Since I’m using the camera’s HDR, it works well in combination because I still have a range of exposure for it to work with. I’ve even used Simple HDR with ProHDR a couple of times to get a colorful, exaggerated, painting-like effect.
I think I just created a blog post for my blog as a comment on your blog. :-)
Also, the Rule of Thirds is important to making many photos interesting,, but sometime I forget in getting a quick shot so I crop it that way later.
Thanks so much!! I just downloaded a bunch of these to try.
I was just telling my husband the other day that I wish I had an iPhone simply for the camera. I don’t like bringing my big camera out and about so I need something smaller…a camera that also doubles as a phone. :)
My iPhone takes better pictures than my small point-and-shoot camera – which was quite the camera when I bought it. Technology moves fast!
Julie, my last point & shoot was my wife’s main camera. (A canon powershot. I have an slr.) When its life was over, instead of spending $250-500 on a new one, we bought her the cellphone with the best camera on the market. She has been been able to capture so many more pictures and is ecstatic about the quality (that can be printed full size) and the fact that her photos are right in her pocket.
Thank you so much! And feel free to follow me around.
Oh – and I also open photos in Camera+ to edit, if the lockscreen open was what I needed to snag a quick picture.
Might have to figure out how to buy apps!
your eyes will be opened. :-)
WHY did I read this at 11:30 at night?!?! If I’m over-tweeting photos all night you’ll know why ;-)
I hope you got a little sleep. :-)
By the way, I’m still puzzling as to how y’all got that “baby lineup” photo. I can’t get one baby to sit still that long, let alone eight! It is truly a photographical miracle.
Thank you for the great tips and heads up on the apps. And thank you for taking the time to write it all down. Great post. Also, Camera+ should give you kickbacks!
Thanks! And they don’t, but it’d be nice!
Great blog! Love the tips. I’m on android and would recommend:
HDR Camera+ is the best Android HDR camera.
Snapseed is my goto app for photo adjustments.
Photoshop Touch is advanced, but worth learning.
Photo Editor lets you adjust levels and curves.
Pixlr Express has tons of effects.
Keep shooting!!
Thank you for the app recommendations! I just downloaded several to experiment with.
Is there any quick way (short cuts) to launch camera+ ?
I wish there were! That is the one downside of not using the native camera app. I just have camera+ on my front screen, ready to go.
Here are some additional apps suggested on twitter:
From Blaine of @InstagramBham: 645 Pro Mk II, Snapseed, Picfx, Mextures, Afterlight, VSCOcam, and LiveDOF
From @benpike: Diptic
I’ll be experimenting with these soon!
Thank You for this post! I tend to lug around my DSLR and haven’t often used my iphone camera because of the poor quality. I’m definitely going to try some of these!!
Great! Let me know if you have any questions, and I hope to see some of your pictures!
This is awesome! My iphone pictures are terrible! I’ve always wondered how people get such amazing camera pictures while mine are blurry and dark and total crummy. I’m excited to try some of these apps and tricks :).
It’s amazing what a difference lighting makes, too. All iPhone pictures can be horrible in the wrong light!
Rachel, I’m so happy to have found you. (As you know, from being featured on BlogHer’s facebook feed.) I use Camera+ and will even open photos in it specifically to edit, but the native camera has the benefit of being opened via the lockscreen. I am new to the iWorld, so I don’t know how it compares to previous iterations, but iOS7 camera is excellent.
I will be following along, so while I might look like a stalker because I’m going to follow all of your accounts, I promise it’s just because I think you’re going to be (read as “already are”) awesome.
Wow I cannot believe all these pictures came from your phone!! I, sadly, am still using the 3g. Terrible, I know, but I am finally due for an upgrade so when I get the 5 I will immediately download all these apps! And maybe I’ll just go ahead and download them on T’s phone, b/c I usually steal it to take pics when we are out anyway! Thanks!
You’re going to flip when you have the abilities of the 5 all the time! It’s fantastic!
These are great tips—thanks for posting them. I also use PhotoToaster to straighten my horizons, as they always seem to dip on the right side.
Thanks for that recommendation!! I’ve needed something for that very thing.